


GORE-TEX® Fabric Repair Kit
GORE-TEX® and WINDSTOPPER® repairs have never been so easy.
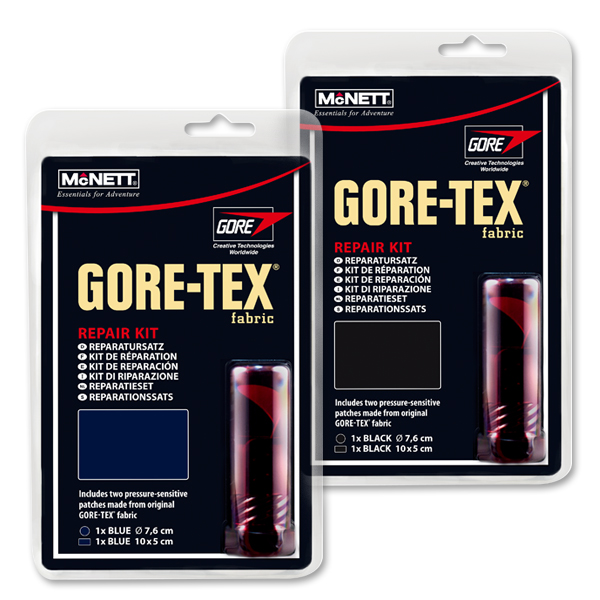 The McNett® GORE-TEX® Fabric Repair Kit is the only authorised repair kit for Gore-Tex based outdoor equipment and is an essential item for emergency repairs.
This Kit contains two adhesive-backed pressure sensitive patches made from original GORE-TEX fabric which provide a strong, flexible and water-resistant infield repair.
Easy-to-remove backing tape aids instant application or first cut to the required shape and size for repairs to holes, rips or tears etc. Repaired item can be used immediately and patches are residue-free should a more professional repair be required in future. Patches can also be ironed on to provide stronger adhesion and a more permanent repair. Patches are lightweight so can be easily stored in a wallet or back pack for later use. Suitable for fast, long lasting repairs to most Gore-Tex products and other technical breathable clothing or footwear i.e. waterproof-breathable jackets, rainwear, trousers, shoes, fishing waders and camping equipment i.e. backpacks etc.
For permanent repair, Contact a W.L.Gore & Associates, Inc certified repair facility..
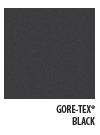
Available in black only
- Suitable for repairs to most Gore-Tex products and / or other technical breathable clothing or footwear etc.
- Provides a strong, flexible water-resistant infield repair
- Can be ironed on to provide stronger adhesion and permanent repair
- Repaired item can be used immediately
- Residue-free patch removal
- Each patch contains a strong, pressure sensitive adhesive with an easy-to-remove backing tape to aid easy application
- Kit contains two pressure sensitive patches – one round 7.6 cm diameter for holes and smaller tears and one rectangular patch 5 x 10 cm for larger rips and tears
- Lightweight patch – weighs only 4 g – easily packs into a wallet or pocket for emergency use
GORE-TEX® is part of the McNett GEAR AID™ product range.![]()
GORE-TEX, DRYLOFT and GORE and designs are trademarks of W. L. Gore & Associates, Inc. ©2000 W.L. Gore & Associates, Inc. Made in EU.
The patches supplied in this kit will provide a temporary water resistant repair for GORE-TEX® fabric products.
For quick infield repair ensure that the area to be repaired is clean and dry. Especially remove any dirt or loose debris. Select a patch that overlaps the tear by at least 12 mm in all directions. If possible, lay damaged area of garment over a flat, firm surface before applying patch. Remove release paper from back of patch. Grasp patch so that initial pressure and contact with garment can be made from the centre of patch rather than the edge. For best results, apply finger pressure from the centre of the patch out toward edges, working in different directions to cover the full area of the patch. If patch wrinkles upon application, quickly lift off and reapply. Garment can be used immediately, however, the adhesive will continue to strengthen over the next 12 to 24 hours.
For home-repair ensure that the area to be repaired is clean and dry. Especially remove any dirt, grease or oil by hand laundering; allow to drip dry. Machine laundering should be avoided to keep the tear from getting larger or fraying. Follow the Quick Field Repair directions for the selection of patch size and application to garment. Patches can be cut to size if desired, but all corners should be left rounded for better adhesion. After the patch has been applied, tumble the garment in a dryer for 30 minutes on regular setting or, better yet, warm the patch with a clean iron. Set the iron to medium or permanent press heat. Use moderate pressure and circular motion for 30 seconds to heat evenly.
The easiest way to remove a patch is to have the garment dry cleaned. If dry cleaning is not recommended or it does not entirely remove the patch the first time, then try the following: Warm the patch for 30 seconds using an iron set to medium or permanent press heat. Use moderate pressure and a circular motion to heat evenly. Quickly lift up an edge or corner and pull slowly but firmly across the patch. Be careful not to make the rip or tear larger when doing so. When the area has cooled, remove the adhesive residue with rubbing alcohol and some terry cloth. Rub in a circular motion for at least one minute until the adhesive has lifted. Dry cleaning will also remove any residue.
• Patches should be kept in sealed plastic bag until used.
• Area to be repaired must be clean and dry.
• Patch will not adhere effectively to loose debris, grease or oil.
• Patch should overlap tear by at least 1cm in all directions.
• Remove release paper from back of patch. Lay GORE® product on a smooth flat surface and apply patch using finger pressure (adhesive side down). Rub patch surface in a circular motion from the center out covering the entire patch area.
• Product can be used immediately; however, the adhesive will continue to strengthen over the next 12 to 24 hours.
• The durability of the patch can be enhanced by applying heat and moderate pressure. Use a clean iron and set to medium heat. Press with moderate pressure in a circular motion for 30 seconds.
“I have one patch that’s lasted over five years of three-season abuse on a G-tex jacket. This works.” -Asamov, Spokane, WA
“This stuff is almost miraculous. You can cut it to any shape you need, and it will stay stuck for as long as you need it, even when it gets soaking wet. I’ve used it on both torn clothing and partially melted gloves (yes, I got them too close to the fire), and it has never let me down.” -C.J. Udd Falls Church, VA
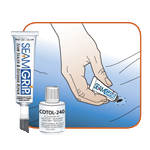
REPAIR YOUR OUTERWEAR
Seam Grip® permanently repairs common pinholes and tears in your outerwear. Apply just enough Seam Grip to cover the hole and spread 1/4” (6 mm) beyond. Allow to dry level overnight. For 2-4 hour cure time, mix Seam Grip with Cotol-240™plus before applying.

KNIFE TIP
To sharpen a knife, slide the knife across the sharpening stone as though you are trying to cut a thin slice off the stone. Hold the blade at roughly a 20 degree angle and draw it steadily. Be sure to count the number of strokes and do the same number of strokes on the opposite side.
YOU MAY ALSO BE INTERESTED IN…